Resources
Before you can wire up an integration flow, you need to define the resources the project will talk to. This lesson explains how Magic xpi centralizes those definitions and walks you through creating your first mail-server resource.
What is a resource?
Every external system Magic xpi connects to — an SMTP server, a database, a REST API, a file share — is a resource. The Resources section of the Settings dialog is the central place to define them. From the Project menu, choose Settings to open it.
Each resource carries the configuration details needed for a successful connection — for example, the host, port, and credentials for a database. You configure those details once and reference them everywhere.
Advantages of a central resource catalog
- Reuse. The same resource can be referenced from many flows; you maintain its credentials in one place.
- Portability. Resource configuration lives separately from the integration logic, so deploying to a new environment is just an XML swap.
- Sharing. Resources can be shared across multiple integration projects — common for email and database connections.
Resource types
Resource types are predefined categories that share the same set of properties. Database is a resource type, for example: you may have multiple databases defined in your project (Oracle, MySQL, MSSQL), but they all share the same shape of configuration.
The shipping resource types live in
<Magic xpi 4.14.1 install>\Runtime\resource_types.xml.
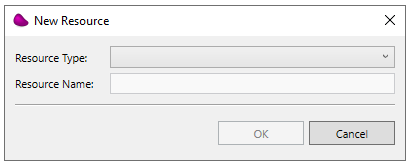
Adding a new resource
The Resources section is split into two panes: the left pane lists the defined resources grouped by type; the right pane shows the configuration properties of the resource you've selected.
- Open Project » Settings and select the Resources node on the left.
- Click Add. The New Resource dialog opens.
- Choose Email from the Resource Type dropdown — you'll use this resource later to notify the salesperson.
- Set the resource name to Company mail server. (You can rename a resource at any time from its context menu.)
- Click OK.
Configuring the mail-server resource
Once added, the resource appears in the left pane and its properties show on the right. The set of properties depends on the resource type — for Email, you configure both incoming and outgoing servers.
| Server Type | POP3 or IMAP for incoming mail; leave blank for outgoing-only configurations. Use IMAP for the course. |
|---|---|
| Incoming Mail Server / Port | e.g. mail.example.com on port 110 (POP3) or 143 (IMAP). |
| Incoming Secure Connection | Use SSL for the incoming connection. |
| Outgoing Mail Server / Port | The SMTP server (e.g. smtp.example.com); typically port 25 or 587. |
| Outgoing Secure Connection | Use SSL/TLS for SMTP. |
| From Address | The address messages will be sent from. |
| Authentication Type / User / Password | How Magic xpi authenticates with the mail server. Bold properties are mandatory. |

Exercise
Practice what you've learned by adding a database resource for the course data.
Magic_xpi_course database.
Loading the course database
To complete the rest of the course, load the supplied tables into your local MSSQL Server:
- In
<Documents>\Magic\projects\Magic_xpi_course\course_data\DB\MSSQL, openrunsql.batin a text editor. - Replace
%1with your database user name,%2with your server name, and%3with the password. - Save and run
runsql.bat. - Open
logsql.txtin the same folder to confirm that all tables loaded successfully.
Summary
You learned about the Resources section of the Settings dialog — the single location where you configure the external systems Magic xpi connects to. You created an Email resource and a Database resource, both of which you'll reuse during the rest of the course.